A compound knot you can pull as tight as a guitar string for a variety of uses.
There’s plenty of debate about which knot is the most important. Anyone who’s been in the military will tell you the story of their boot camp drill instructor telling them a bowline was the “only” knot to know, but maybe that DI never heard of the trucker’s hitch.
The trucker’s hitch has been around for centuries going back to medieval times when it was used to tie down loads on carts and barges. Our pioneer ancestors used it frequently as they wandered the Great Plains with their horses and wagons. Of course, they didn’t call it a trucker’s hitch back then, but the concept is the same.
Today it’s called the trucker’s hitch because it is still widely used by truckers around the world to tie down loads on their trucks and trailers. The reason is that the design of the knot allows you to pull and tighten the rope and then tie it off, keeping a taught tension on the rope.
Many knots cause some slack to occur in the rope as the final knot is tied, but the trucker’s hitch is designed to keep that from happening. In some respects, it’s an improvised block and tackle made from rope. Better yet, the design of the knot makes it quick release.
Tight knots exposed to the weather can be impossible to untie. Ask anyone who has struggled with a tight and wet square knot. The result is we cut a lot of rope. A trucker’s hitch always unties easily and saves your rope for another day.
A Simple Knot That Looks Complicated
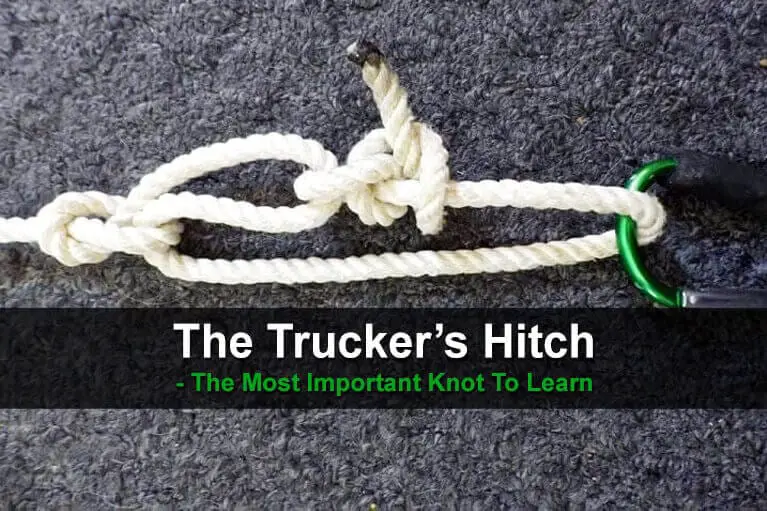
At first glance, the trucker’s hitch looks like a complicated knot, but once you understand the fundamental two steps to tying it, the whole process gets fairly simple. It essentially involves creating a dangling loop and passing the end of the rope through that loop and tying it off with two half hitches.
There are also variations on the trucker’s hitch for taking up slack to create a taut, adjustable rope. These variations are determined by the primary loop that gives the trucker’s hitch its mechanical advantage.
The alternative methods of forming the loop affect the ease and speed of tying and releasing, and the stability of the final knot. The variations are called a number of names including the Sheepshank style loop, the Slipped overhand loop, the Simple friction loop, and the Fixed loop.
Many of these variations are cultural with different designs across Asia, Africa, and Europe, and all are called the trucker’s hitch. Use of the variations is largely dependent on the need and situation.
A great use is to tie a trucker’s hitch to a car or truck stuck in a ditch or the mud. The ability to adjust the slack and get a taught rope avoids the sudden jerk that happens when towing a vehicle with a slackline.
Once you start using the trucker’s hitch, you’ll probably find that you use it more frequently and, because it gives you the leverage of a block and tackle, you can even use it to lift heavy tools and machinery. A lot of that will depend on the strength of your rope and the weight of what you’re trying to lift.
In actual fact, there are dozens of variations on the trucker’s hitch but we’re going to keep it simple for now and focus on the two most often used versions of this knot:
- The Classic Trucker’s Hitch
- The Sheepshank Trucker’s Hitch
The Classic Trucker’s Hitch
If you take this step by step, this is an easy knot to tie and understand. Here are the steps or you could watch a video that demonstrates the technique.
Step 1
Create a loop in the line of your rope and hold that loop where the rope crosses itself. You can do this easily by pinching the crossed segment together with your forefinger and thumb. This motion of taking your line around itself to create a loop is called a crossing turn.
Step 2
Then, with your free hand, feed some rope from after the crossing turn through the loop. You should only pull enough line through your first loop to create a second loop or dangling loop that emerges from your first. This will only require a few inches of line.
Step 3
Cinch your first loop tight. You can do this by tugging on the side of the second loop feeding toward your anchor and the line that is feeding into your first loop. This should cinch your line and first loop around the second loop so that you no longer need to hold it together with your fingers.
At this point, you should only have a single loop in your line. This loop should stick out of the now cinched tight first loop. This is the slip knot portion of your trucker’s hitch.
Step 4
Anchor the free end of your line. You can do this by passing the tail end of your line around or through a sturdy object, like a cleat, peg, carabiner, or secure post. Make sure that whatever you use as your anchor point is strong enough to secure what you are holding with your line.
Step 5
Pass the free end of your rope through the dangling loop. Pull the line firmly to tighten the knot and make the string between your first and second anchors taut. Too much slack in your line could cause your load to slip or shift.
Feed the tail end through the loop until there is no longer any slack in the free end of your line. This will also serve to tighten and strengthen your trucker’s hitch knot.
Step 6
Finish the knot with two half-inch locks. These locks are sometimes called hitches. Take your free end around both post-knot strands of your line.
Since you have run your line around/through an anchor point and returned it back to the knot to finish the tying, your post-knot rope will have two strands.
Step 7
Pull your free end through the loop and pull it tight, then slide this to the base of your main knot.
You may have some stops and starts but once you get the hang of it and understand the dynamics of how it works you’ll find it’s easier to tie. You should also practice tightening the knot and releasing it. Here’s another video of how to tie this knot for a quick and easy setup and takedown for a lean-to.
Tying the Sheepshank Trucker’s Hitch Variation
A sheepshank is a knot used to shorten a line without cutting it. It’s another knot that truckers use to save themselves from constantly cutting up their ropes. You can put a sheepshank anywhere on a rope’s length to shorten it, but this combines the sheepshank with the trucker’s hitch using one of the loops of the sheepshank as the dangling loop of the trucker’s hitch.
Step 1
Create two crossing turns in your line. A crossing turn passes the free end of your line around itself so that it continues away from your already secured end of the rope, forming a loop.
Do this twice, and be sure to leave yourself extra line in each turn so both form loops large enough for your rope to pass through.
Step 2
Pass a small amount of rope through the turns and tighten. Take a few inches of your rope from the line after the crossing turns and pull it through both loops.
Leave enough line after the second of your two crossing turns so that when you tighten your line, there are loops both above and below the turns.
Step 3
Anchor the free end of your line and feed it through the loop. Just as you’d do with a normal trucker’s hitch, you’ll want to take your line around an anchor point and bring it back to the free end oriented part of your knot.
Step 4
Pass your line through the loop there and pull tight. This modified trucker’s hitch is good for light to moderate tension, but it is susceptible to failure under extreme duress. You might want to choose a different knot for especially heavy loads.
Step 5
Fasten the end of your line and your trucker’s hitch knot with two half-hitch knots. Just as you would do for a normal trucker’s hitch, you can create simple locks (also called hitches) in the line at the free end oriented part of your knot.
Simply take your free end around the double strands of your line at the base of the knot and pull it tight, sliding the lock to meet the base of your knot.
Practice
It’s highly unlikely that you’ll have your computer with you when you’re out and about trying to tie a trucker’s hitch for the first time. The best way to solve this is to practice tying the knot until its second nature.
The concept is simple once you create that dangling loop. Once you’re mastered it and understand the concept, you’ll probably use it again and again.
Up Next:
via Urban Survival Site at https://ift.tt/2xKnazz


0 Comments